

This easy-to-follow gluten and dairy free pie crust recipe provides step-by-step, picture by picture, directions. Enjoy a light, flaky, gluten and dairy free pie crust. It is perfect for all pies, pot pie dinners, and casseroles.
Can You Make a Gluten and Dairy Free Pie Crust Ahead of Time?
Yes! If you are getting ready for a baking weekend, then you can make your pie crust dough a few days early. First, roll the dough into two balls. Then, wrap it tightly in plastic wrap. Next, put the wrapped balls of dough into a ziplock bag. Make sure you remove as much air as possible from the ziplock bag. Lastly, store the dough in the refrigerator until you are ready to roll it out and bake.
Can You Freeze a Gluten and Dairy Free Pie Crust?
Yes! Whenever the holidays come around, I make a few gluten and dairy free pie crusts ahead of time to freeze. Use any type of metal, glass, or disposable pie pan. Place your pie crust in the pre-oiled pan. Then, cover the top of the pie crust with wax paper or parchment paper. If you are freezing one pie crust by itself, then place it in an airtight ziplock bag. You may also want to wrap the pie crust in plastic wrap.
If you are freezing multiple pie crusts in pie pans, then you can nest them together with layers of wax paper in-between them. Place an empty pie pan on top. Then, plastic wrap the whole stack to make it air-tight.
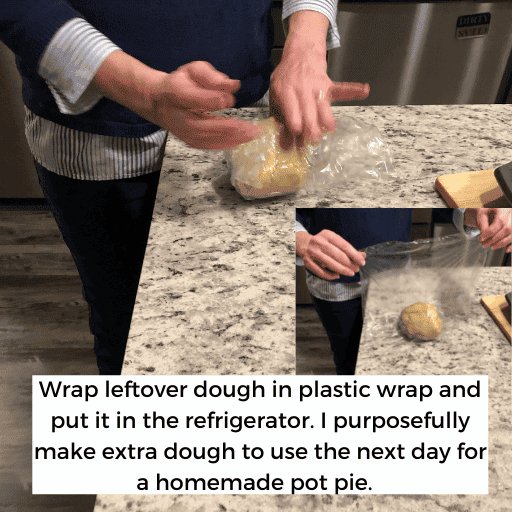
If you need to save space in your freezer, then freeze the dough in balls rather than in pie pans. Start by dividing the dough in half. One recipe makes two pie crusts. Then, shape the dough into balls, wrap them tightly in plastic wrap, and store them in an airtight ziplock bag in the freezer.
Inspiration for Picture By Picture Directions
During my journey through sudden vision loss and recovery, I was surprised by how many daily tasks suddenly became more difficult. It was so strange to depend on another to read my recipes. Later, I read a post from someone recovering from a concussion. She shared how difficult it was to follow a recipe. I understood.
Another concussion blogger shared that her digestion difficulties started after her concussion. Upon reflection, I realized that most of my digestive difficulties also started after my concussion. Then, I had a light bulb moment! I could share my gluten and diary free recipes online in a visual friendly manner, picture by picture.
Please share with others who need delicious, dairy and gluten free recipes. Especially share with those experiencing vision that appears to blur or even double. Visual processing difficulties are common in those recovering from a brain injury and in those who struggle to learn and move with cordination.
Where to Find Millet and Oat Flour
One challenge to making this recipe is finding millet and oat flour at your local store. Oat flour is becoming easier to find. Bob’s Red Mill has a gluten free oat flour that you can purchase online or at your local grocery store. If you are unable to find oat flour, then you can put in a request at your grocery store’s customer service desk.
Unfortunately, I have never found millet flour in any grocery store. However, you can find whole millet at grocery stores carrying gluten free products. If you buy millet grains, you need a coffee mill like the Cuisinart Supreme Coffee Mill or a grain mill like the Mockmill to grind millet grains into a fine flour. Another alternative is to purchase millet flour online.
If you are not allergic to nuts, then Bob’s Red Mill Almond Flour is a great substitution. It is easy to find at grocery stores and creates high-protein baked goods that keep your blood sugar more stable. Once you open the almond flour and other organic gluten free flours, remember to store them in the freezer.
If you want to grind your own grains, an electric grain mill will provide you with the most nutritious flour for your baking endeavors. If you plan to utilize fresh grains in your home on a regular basis, then a Mockmill Grain Mill is a wonderful investment. It mills the smallest grains like millet and also hard grains like oat groats and buckwheat. I was unable to grind millet in my Wonder Mill. I share budget saving tips and resources in Why Milling Grain Enhances Your Life and Saves Money.
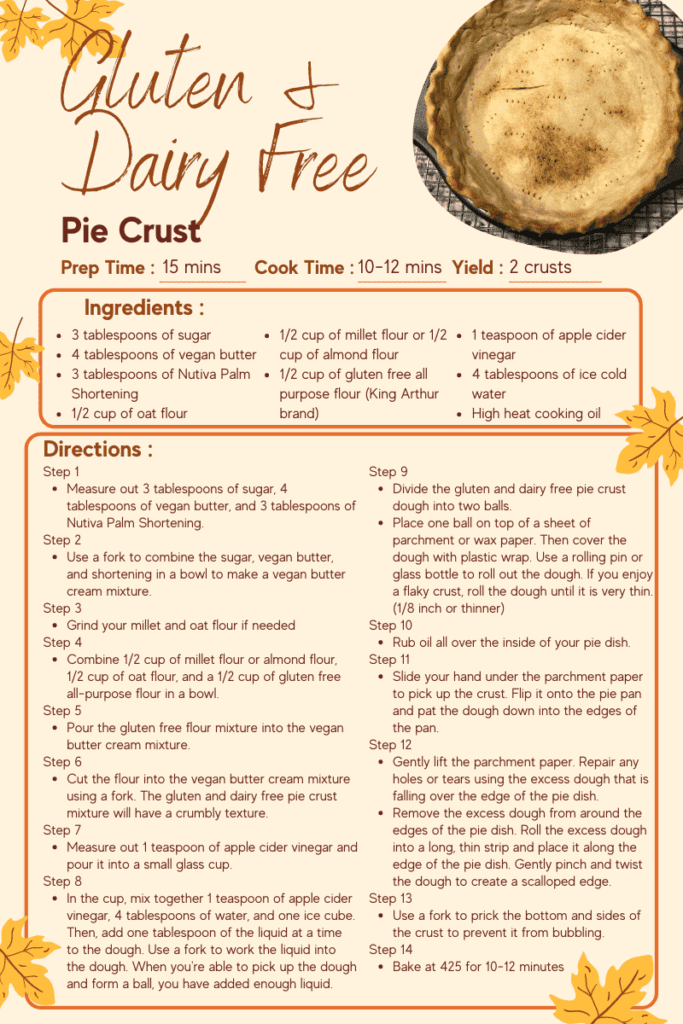
Gluten and Dairy Free Pie Crust Ingredients
This recipe makes 2 pie crusts.
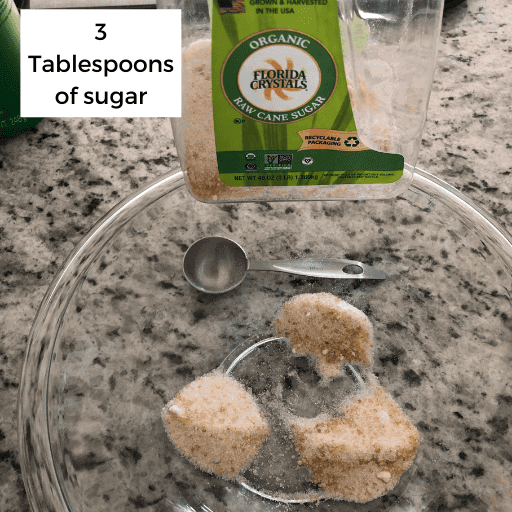
- 3 tablespoons of sugar
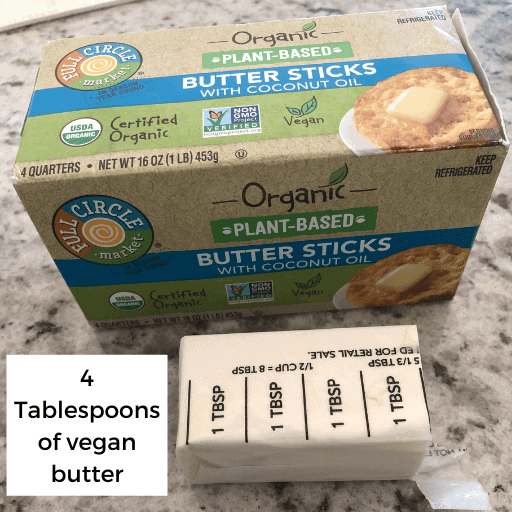
- 4 tablespoons of vegan, non-dairy butter
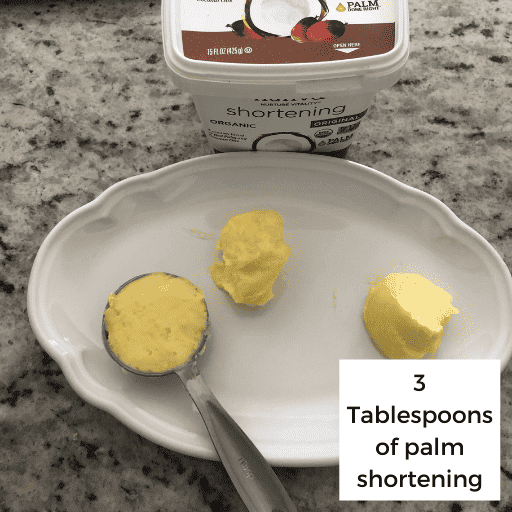
- 3 tablespoons of Nutiva Palm Shortening
- 1/2 cup of millet flour or almond flour
- 1 cup of oat flour
- 4 tablespoons of ice cold water
- 1 teaspoon of apple cider vinegar to water
- Enough high heat cooking oil to spread on your pie dish
Gluten and Dairy Free Pie Crust Directions
Step 1
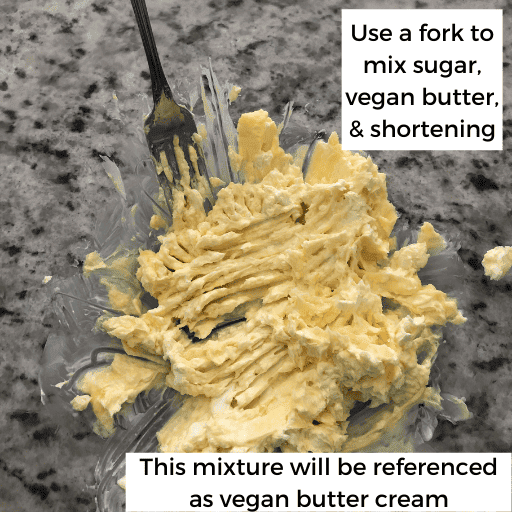
Measure out 3 tablespoons of sugar, 4 tablespoons of vegan butter, and 3 tablespoons of Nutiva Palm Shortening. The palm shortening is essential for making a flaky crust.
Step 2
Combine the sugar, vegan butter, and shortening in a bowl to make a vegan butter cream mixture. Personally, I like to use a fork to blend the ingredients together, but you could also use a pastry cutter.
Step 3
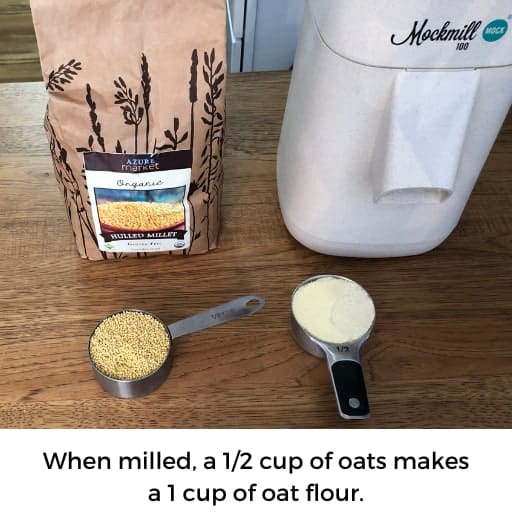
If using millet grains, grind the millet in an electric coffee grinder or a Mockmill. Then, measure out 1/2 cup of millet to make a 1/2 cup of millet flour.
Step 4
Mill a 1/2 cup of oats to make 1 cup of oat flour. Any leftover flour stores up to one month in a glass jar in the refrigerator. Or, you can put the leftover flour in a ziplock bag, remove the air, label it, and freeze it up to 6 months.

Step 5
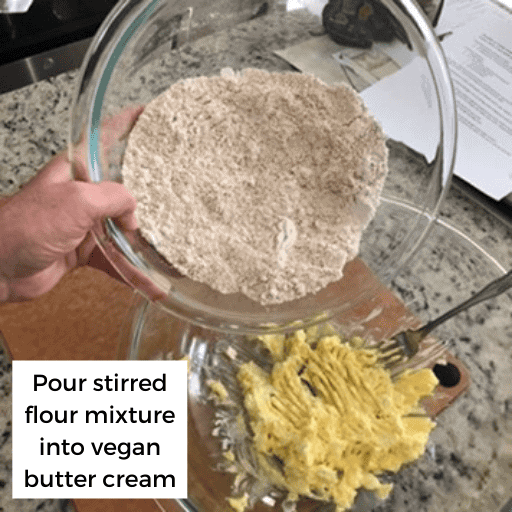
Pour the gluten free flour mixture into the vegan butter cream mixture.
Step 6
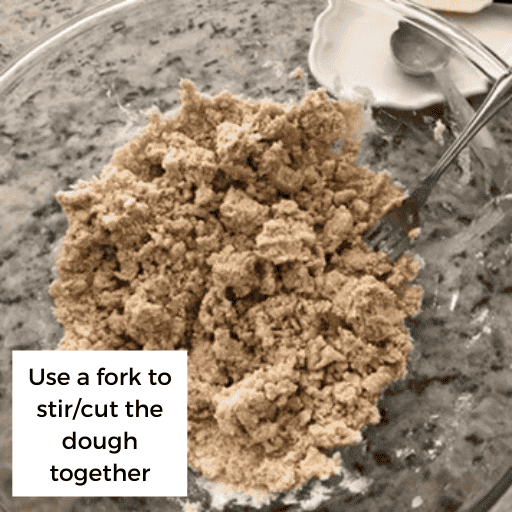
Cut the flour into the vegan butter cream mixture using a fork. When you are done with this step, the gluten and dairy free pie crust mixture will have a crumbly texture. If dry, add more butter.
Step 7
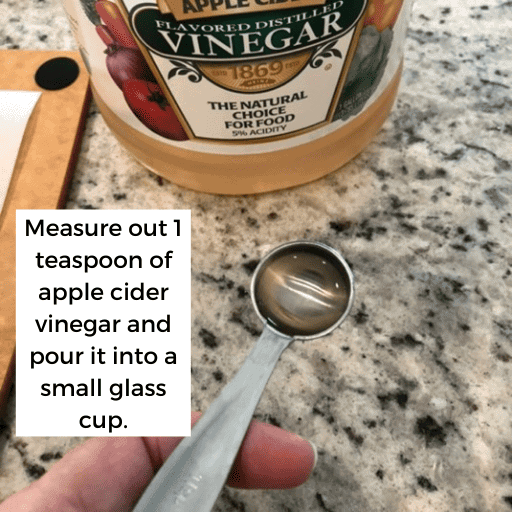
Measure out 1 teaspoon of apple cider vinegar and pour it into a small glass cup.
Step 8
In the cup, mix together 1 teaspoon of apple cider vinegar, 4 tablespoons of water, and one ice cube. Then, add one tablespoon of the liquid at a time to the dough. Use a fork to work the liquid into the dough. When you are able to pick up the dough and form a ball, you have added enough liquid. If it sticks to your hands, you need a bit more flour. I only add a 1/4 cup more of flour at a time until the ball of dough is no longer sticky.

Step 9
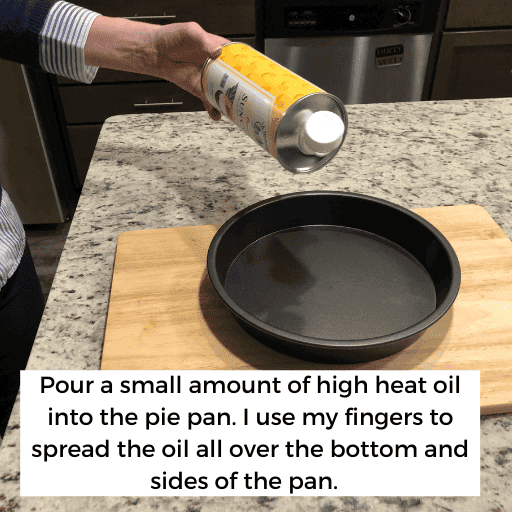
Prepare your pie dish or pan by rubbing a high heat cooking oil all over the pan. You can use your fingertips or a small piece of paper towel.
Step 10
Divide the gluten and dairy free pie dough into two balls. This recipe makes 2 pie crusts.
Place one ball of dough on a large piece of plastic wrap. Then, cover the dough with another large piece of plastic wrap. Pat the dough down with your hand. Then, use a rolling pin or glass bottle to roll out the dough. If you enjoy a flaky crust, roll the dough until it is very thin.
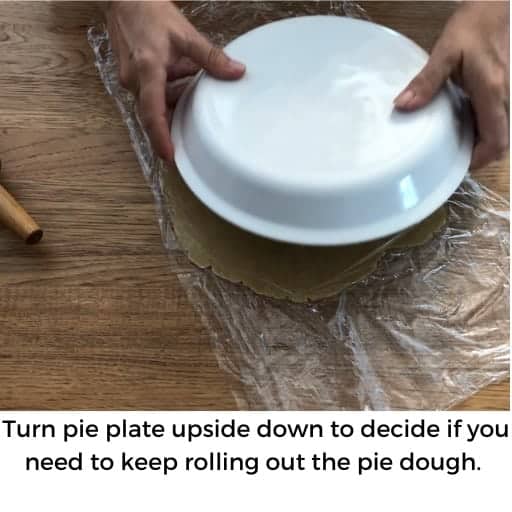
Before you remove the top piece of plastic wrap, make sure you turn your pie dish over to make sure your pie dough is slightly larger than the pie dish. You should be able to see the outer edges of the pie dough all around the turned over pie dish.
Step 11
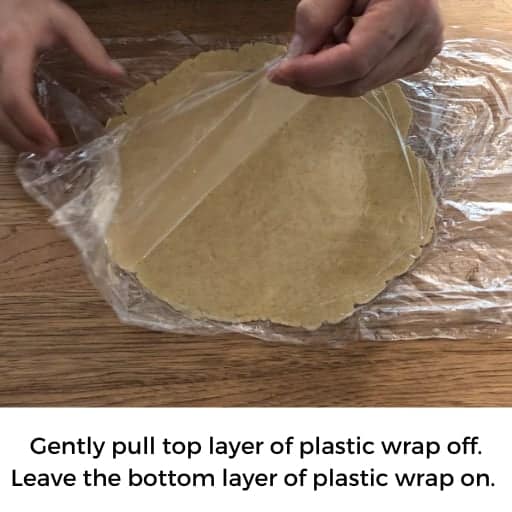
Gently pull up the top plastic wrap until it is off the pie dough
Transferring Dough into Pie Plate and Shaping
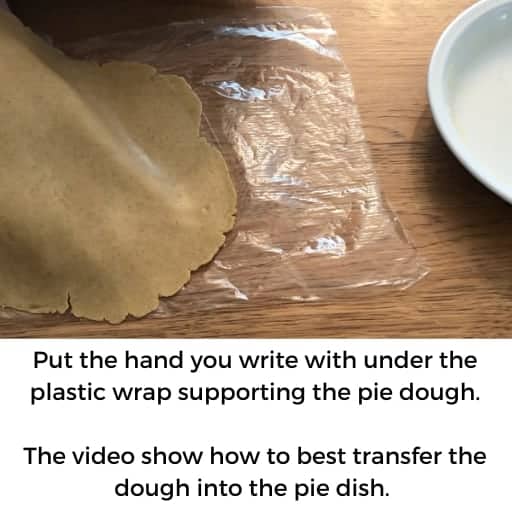
Step 1
Put the hand you write with under the plastic wrap supporting the pie dough. Then, with the other hand, pick up the pie plate. The video shows you best how to transfer the dough into the pie plate.
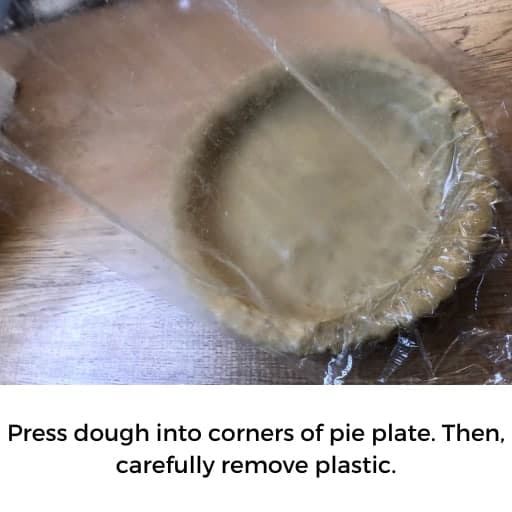
Step 2
After you pat the dough into the corners of the pan, gently lift up the plastic wrap.
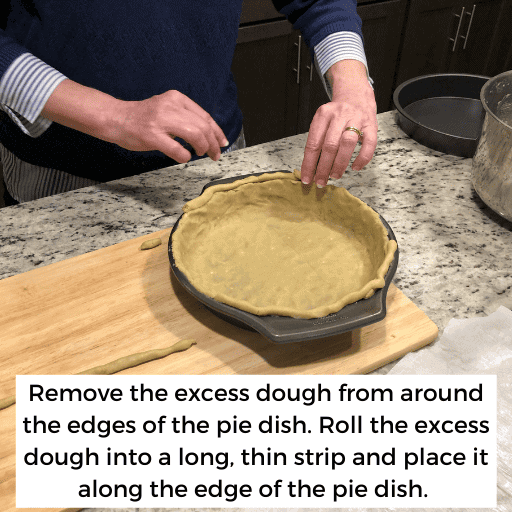
Step 3
Remove the excess dough from around the edges of the pie dish. Then, roll the excess dough into long, thin strips. Place the strips of rolled dough along the edge of the pie dish.
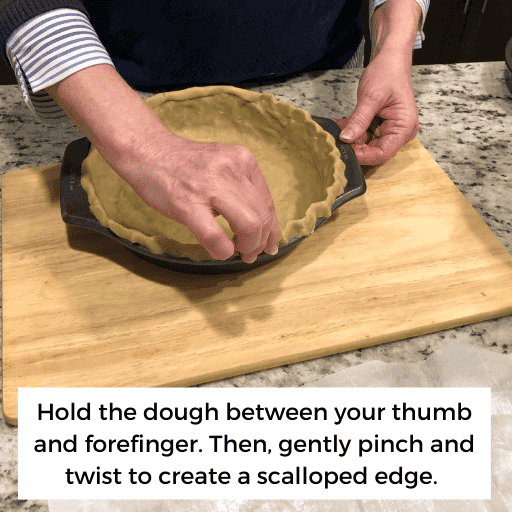
Step 4
Hold the dough between your thumb and forefinger. Then, gently pinch, press downward, twist, and release to create a scalloped edge.
Step 5
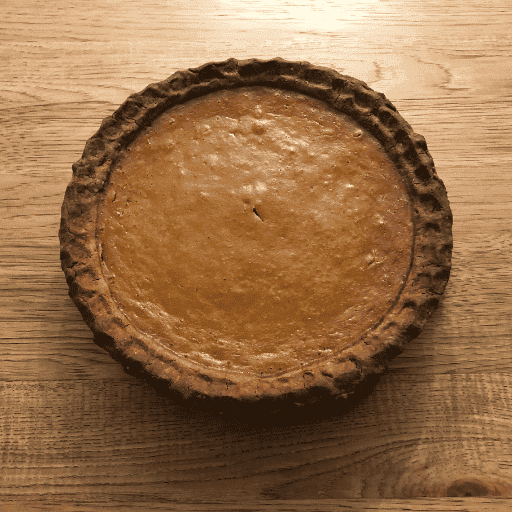
Use a fork to prick the bottom and sides of the gluten and dairy free crust to prevent it from bubbling. Now, you are ready to fill with your favorite ingredients. Enjoy our gluten and diary pecan pie. I am looking forward to sharing our cinnamon apple pie recipe and pumpkin maple spice recipe in the coming weeks.

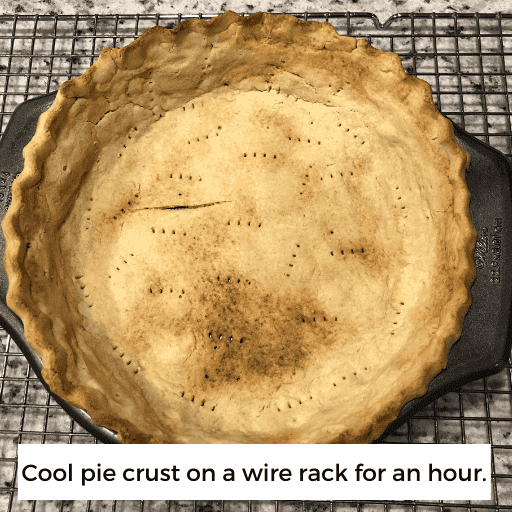
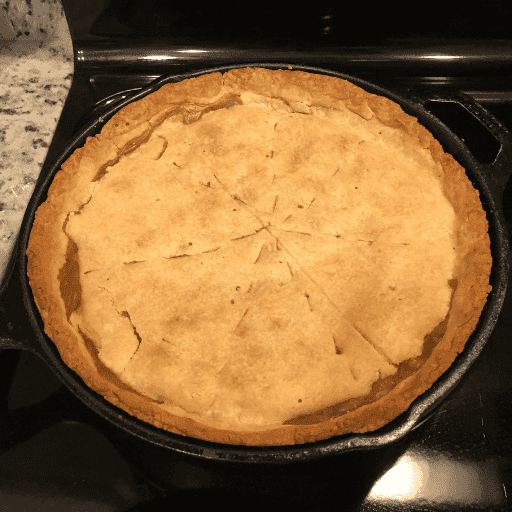
Pre-bake Pie Crust
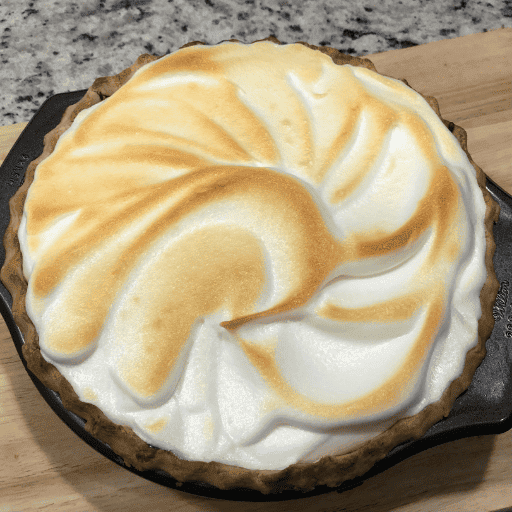
If you need to pre-bake your pie crust, preheat the oven to 425 degrees. Bake it for 8 to 10 minutes. When the crust looks brown, it is done. Check the crust often to prevent edge from burning. Lastly, allow pie shell to cool on a wire rack for an hour or more especially if making our Gluten and Dairy Free Chocolate Meringue Pie or Strawberry Pie.
Gluten and Dairy Free Pie Crust Recipe Card
Leave a comment below if you enjoyed this recipe!


5 Stars.
Great flakey crust.
Thank you! I like it so much that I resist buying GF pie crust.